The Planning Master is by default the Owner of the project.
A feature on Archipad App and Archipad Cloud allows you to designate a team member as Planning Master.
Archipad App
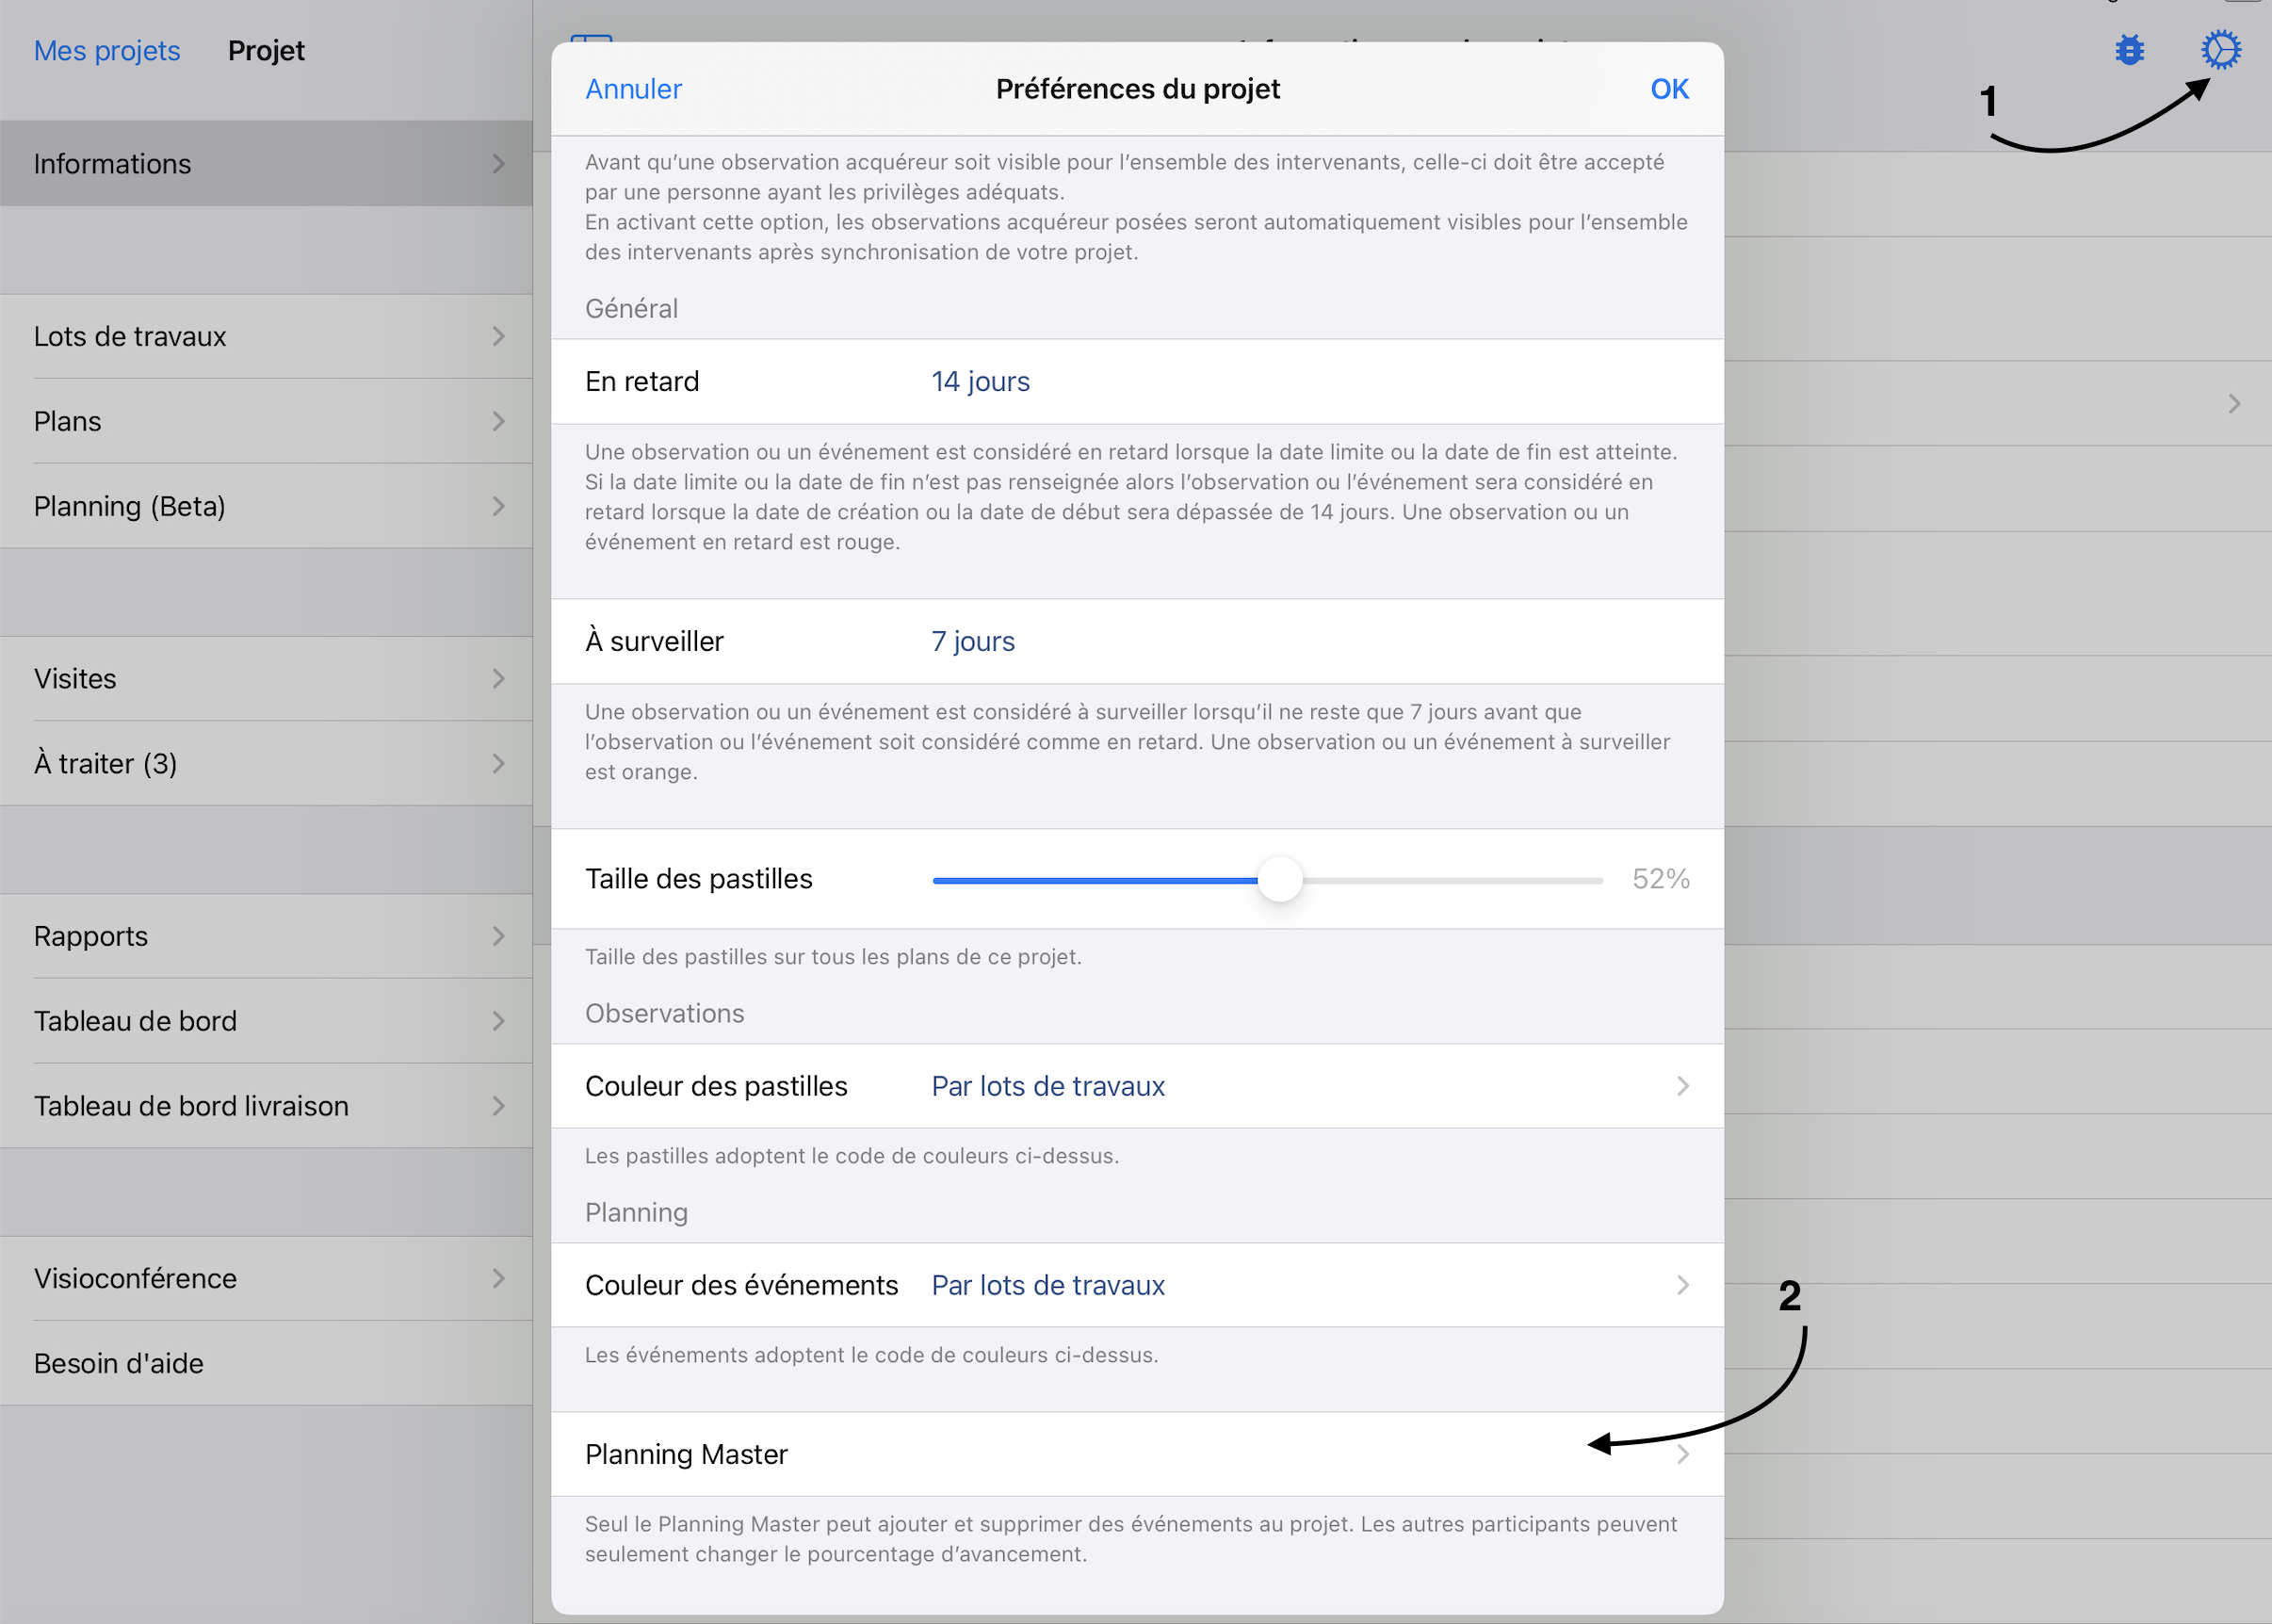
To set a Planning Master on Archipad App follow these simple steps:
Open the Information menu and access the gear icon in the top right of the Screen.
Click on the Planning Master field in the “Planning” section,
Select the member designated as Planning Master from the dropdown list,
Confirm your Selection by clicking Done, then click the Save button in the confirmation message that appears.
Archipad Cloud
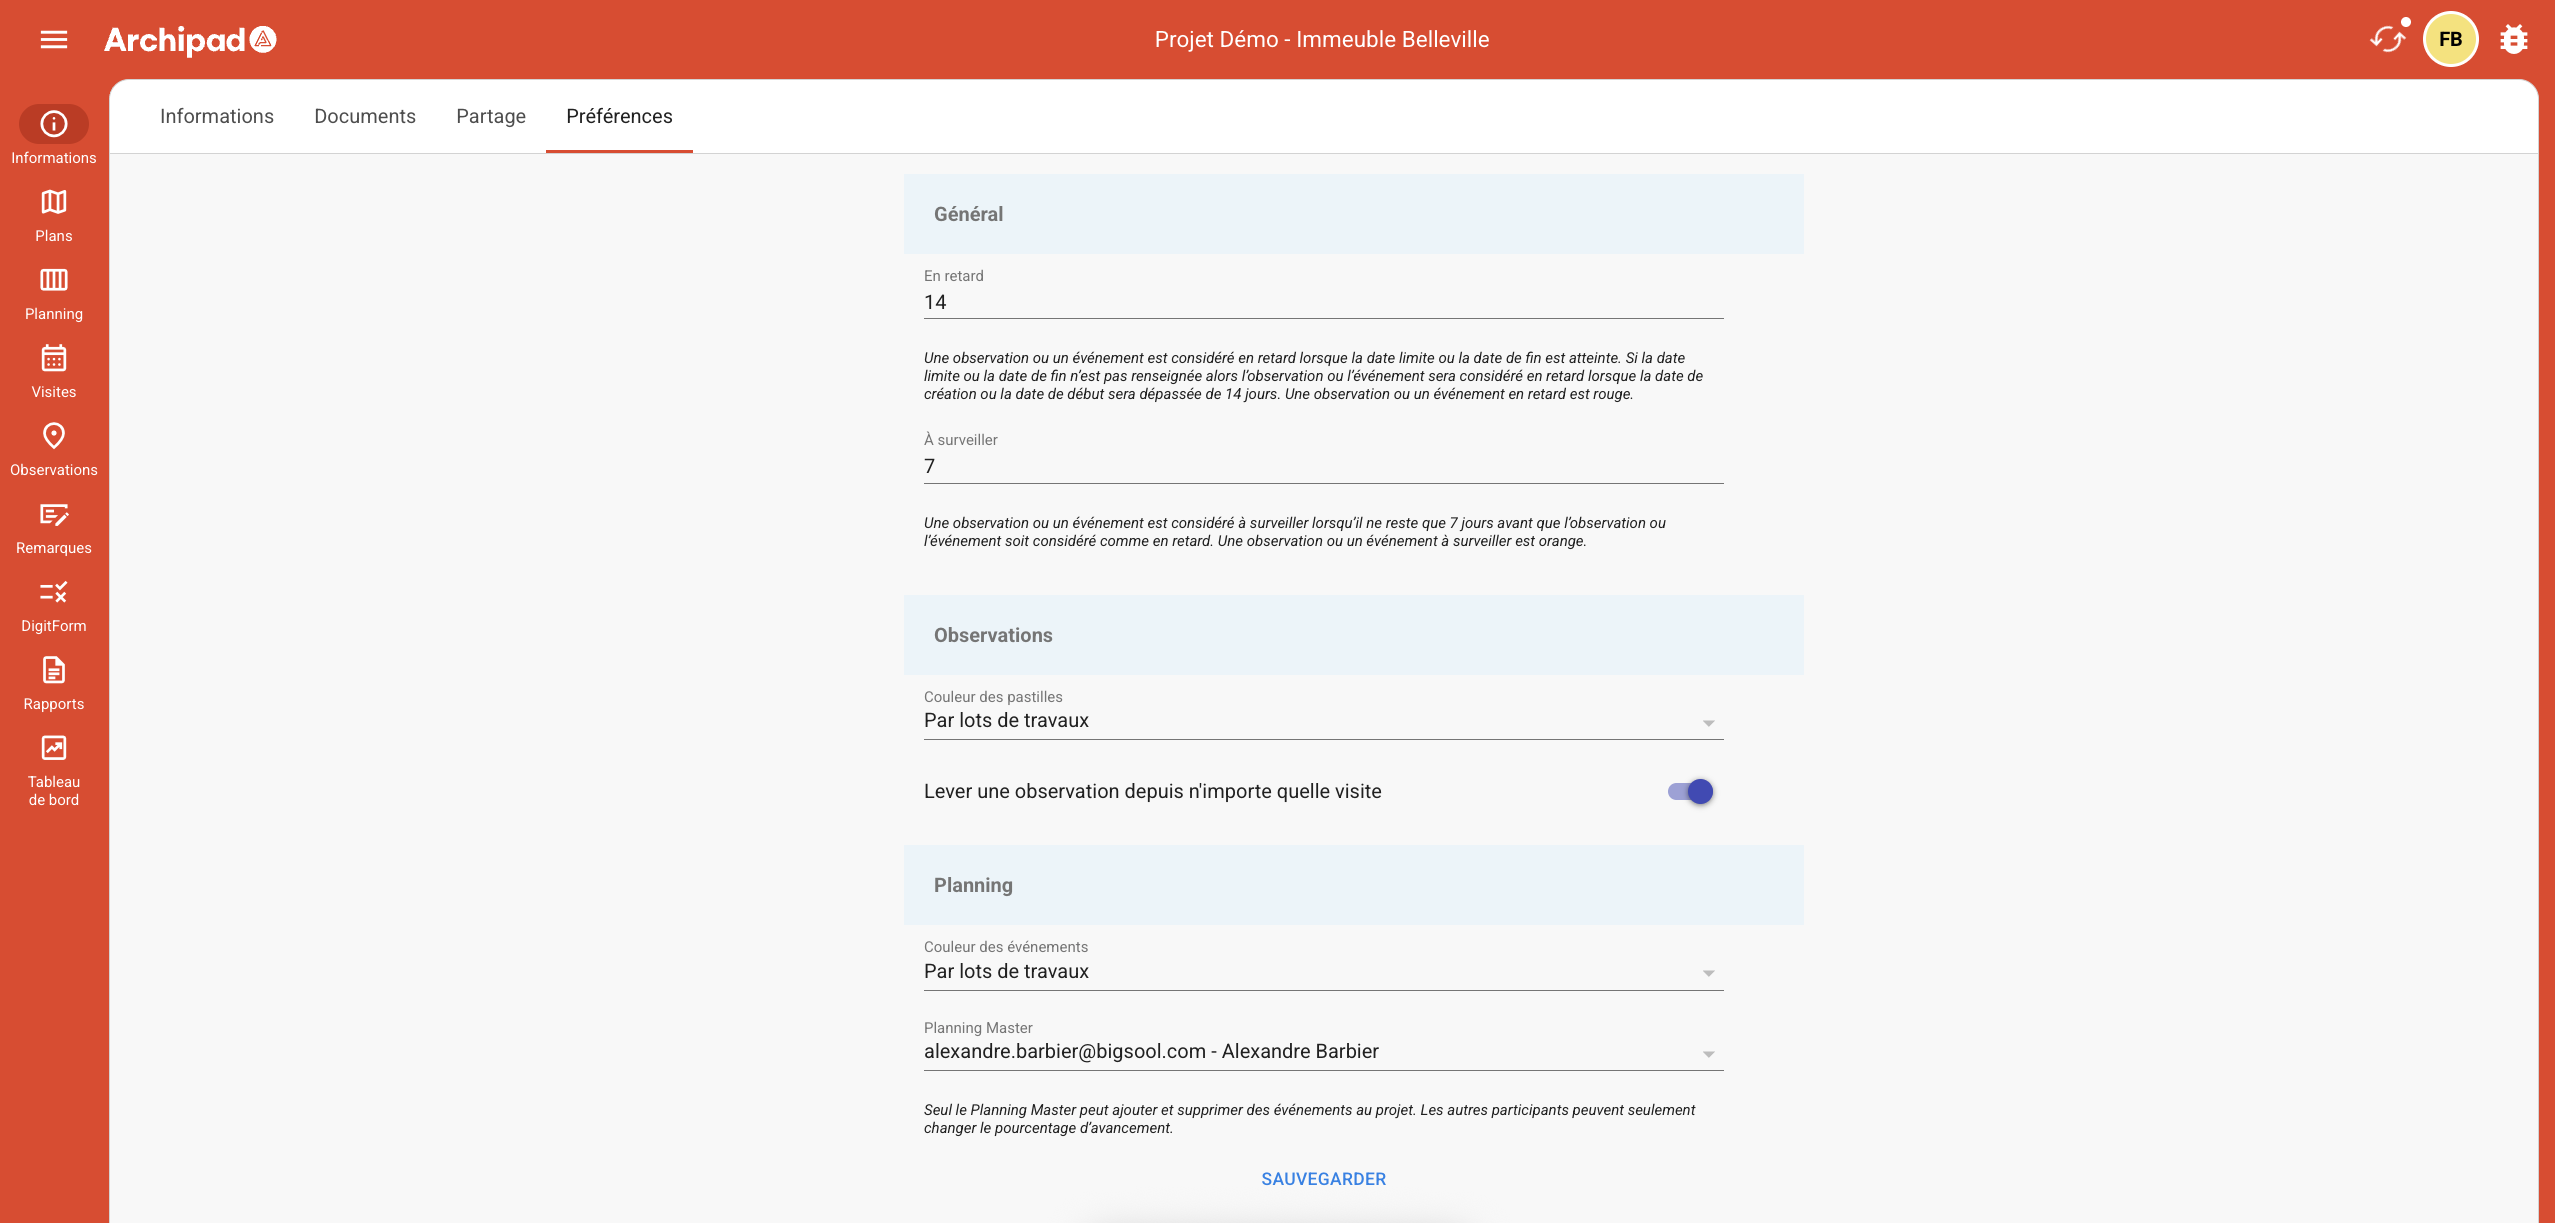
To set a Planning Master on Archipad Cloud follow these simple steps:
Open the Information menu,
Click on the Preferences submenu,
Click on the Planning Master field in the Planning section,
Select the member designated as Planning Master from the dropdown list,
Confirm your Selection by clicking Done, then click the Save button in the confirmation message that appears.