


For a Buyer, or the person representing them, to sign in to the Archipad SAV app, their Contact must be linked to the Unit’s Region. This article describes the 4 steps to follow in Archipad Cloud.
Before you start:
- The “Contacts linked to Region” section is reserved for custom subscriptions.
- These Contacts are registered only from Archipad Web.
- The Unit’s Region must exist. Otherwise, create it in step 2.
- Buyer access must be enabled: Preferences > Buyers > “Allow buyers to sign in”.
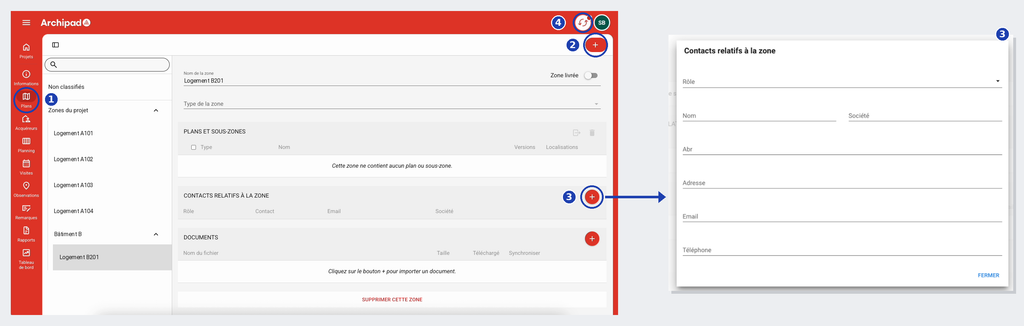
The markers 1 to 4 correspond to the steps below. On the right, the window that opens when you click the pink + button (marker 3).
Steps
- Go to the Plans Screen (marker 1).
- Select the Region in “Project Regions”, then scroll down to the “Contacts linked to Region” Section. The Region doesn’t exist yet? Click “+” in the top right (marker 2), then “Create a new Region”, and fill in the “Region name” Field.
- Add the Contact. Click the pink + button to the right of the Section (marker 3). In the “Contacts linked to Region” window, choose the role “Buyer” or “Buyer Representative”, then complete the available Fields, at minimum the name, Email and Phone. Click “Close”: the Contact appears in the Region’s List.
- Synchronize. Click the synchronization icon in the top right next to your initials (marker 4). The Contact can then sign in to the app with this Email address.
The Email address must be valid. The Buyer or their representative receives their sign in code at this address. Make sure it contains no accents or spaces, for example john.smith@example.com and not smith@buyer.com.